Several steps are required to configure the iSafe Mobile intrinsically safe hardware combination of IS530.1 and the IS-TH1 for use with InspectNTrack.
Step 1
Scan the following barcode to configure the scanner to the proper setting:

Step 2
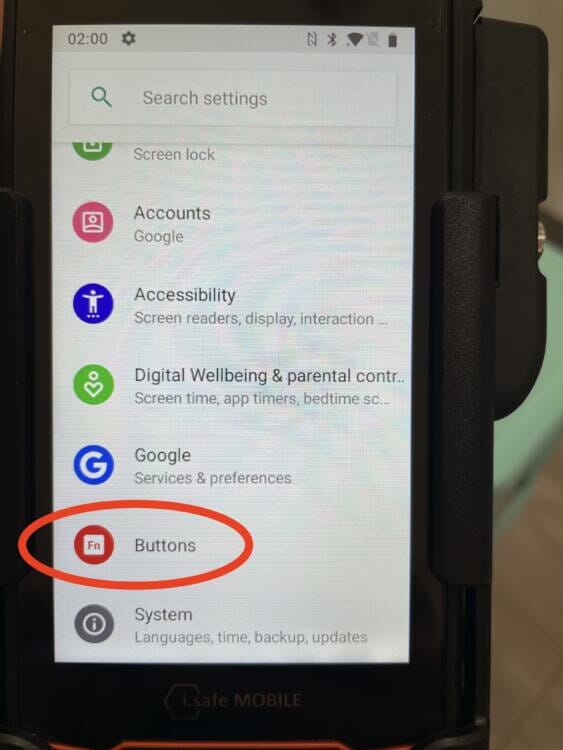
On the device home screen swipe up from the bottom to open the app drawer. Tap on the Settings icon, then scroll to the bottom and tap on Buttons.

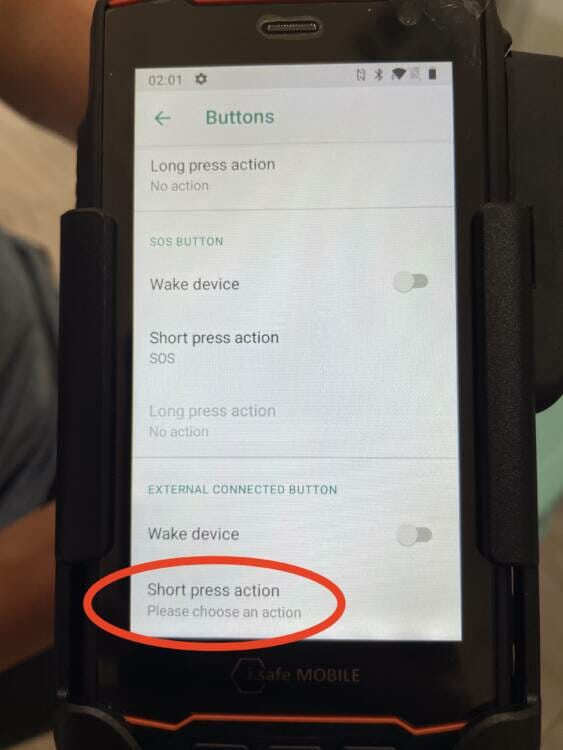
Once on the Buttons screen scroll to the bottom. In the EXTERNAL CONNECTED BUTTON section, tap on Short Press Action.

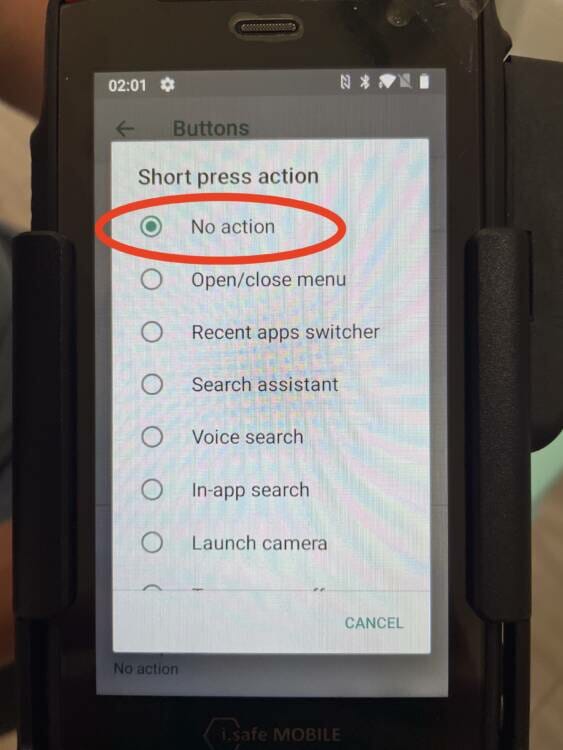
Select No action.

Step 3
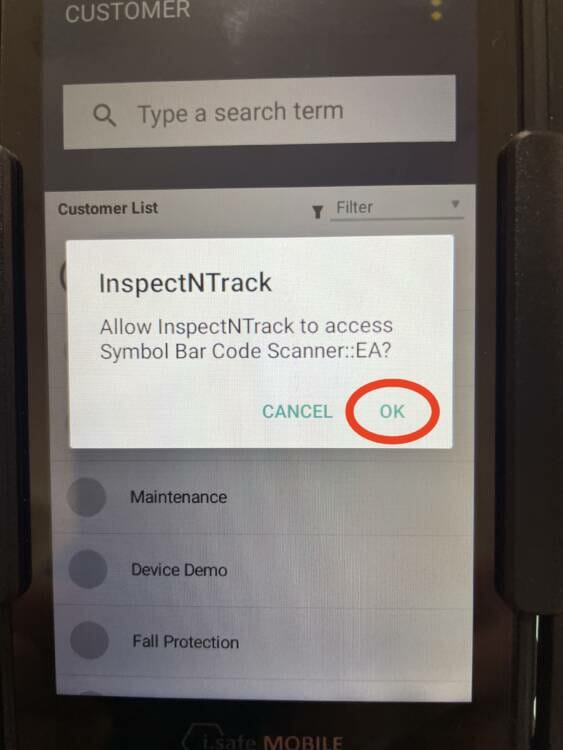
Download the InspectNTrack app. Open the app. A pop-up box will appear asking for permission to access the barcode scanner. Click OK. Login to the app and perform a sync. After the sync is complete click “Begin Inspection”. Do not attempt to scan barcodes yet. Any attempt to scan barcodes at this stage will not work and will produce an error beep.

Step 4
Perform a hard close of the InspectNTrack app. To do this, press the square button at the bottom of the iSafe phone. This will display all open apps as smaller windows on the screen. Swipe up on the InspectNTrack app to close it.

Step 5
Reopen the app and login again if required. The hardware configuration is complete and can now be used with InspectNTrack. This configuration is only required to be performed once during the first time a new iSafe device is used.
Reconnecting The Scanner After Restarting or Charging
When the device is restarted or placed on the charger after the configuration is complete, the InspectNTrack app might not auto-connect to the scanner. The full configuration does not need to be performed, rather use the following steps to reconnect a pre-configured scanner:
When the Device is Charged With the InspectNTrack App Open
Step 1
The app will automatically direct the user to the settings page and request permission to connect to the i.Safe scanner. Press OK.

Step 2
Select the available device. In this example it is called PL5000:…

Step 3
After selecting the device press “PAIR TO SCANNER”

Step 4
A success pop-up will be displayed. Press OK to close the pop-up.

Step 5
The scanner setup screen displays a successful connection. The user can back out of the setup screen and scan barcodes.

When the Device is Charged With the InspectNTrack App Closed
Step 1
Open the menu in the upper, right corner of the app. Select “Settings” and then “Setup Scanner”.

Step 2
Select the available device. In this example it is called PL5000:…

Step 3
After selecting the device press “PAIR TO SCANNER”

Step 4
A success pop-up will be displayed. Press OK to close the pop-up.

Step 5
The scanner setup screen displays a successful connection. The user can back out of the setup screen and scan barcodes.


