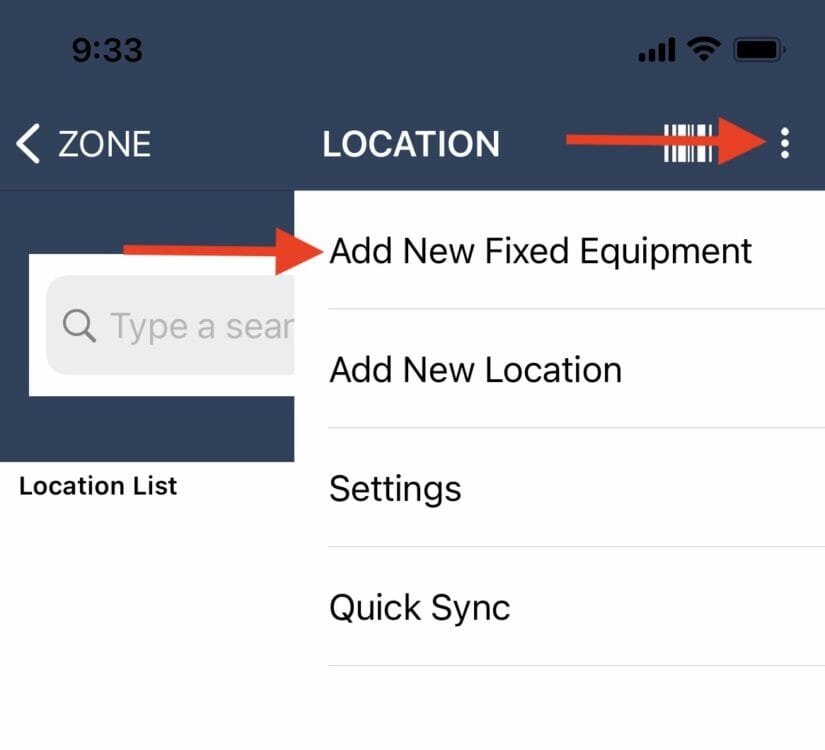
In order to add a new fixed equipment you must be on the Location screen of the mobile app. Tap on the menu in the upper, right corner of the screen and select Add New Fixed Equipment.
The fixed equipment will be assigned to the zone that the user is currently navigated into. Complete the fields as follows:
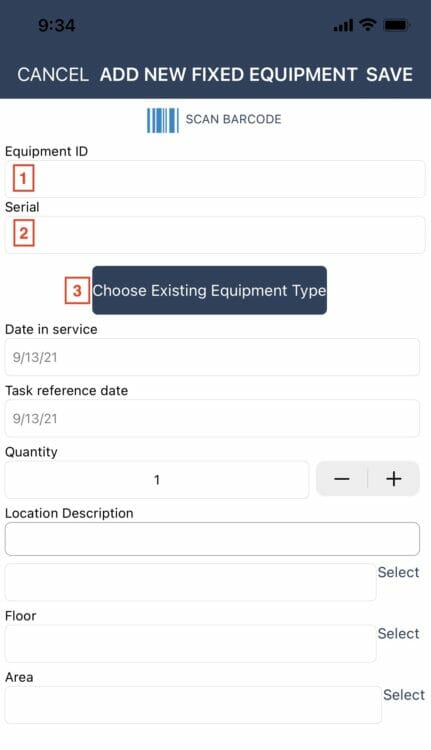
1. Equipment ID – Tap on this field to place the curser in the Equipment ID box. Scan the equipment ID barcode by pulling the scan trigger on a laser scanner, or tapping on the SCAN BARCODE icon to scan with the device’s camera. If a scanning option is not available you may also use the keyboard to type the ID into the box.
2. Serial – You may use the keyboard to type a serial number into the serial box if desired. This field is optional.
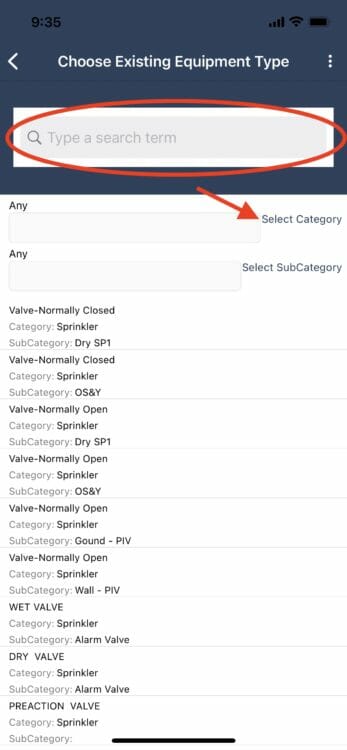
3. Choose Existing Equipment Type – Tap on this box to open a list of all existing equipment types and select the equipment type that the fixed equipment belongs to.
There are three options to find the existing equipment type:
- Scroll through the list to find the equipment type.
- First click on Select Category, then enter a category into the search box on the category screen.
- Search for the equipment description using the top search box.
Tap on the category you wish to select.
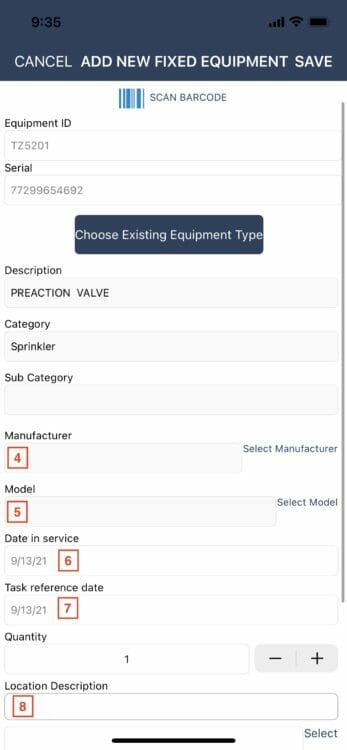
After the equipment type is selected the Description, Category, and Sub Category will be automatically filled into the equipment record. Continue to complete the fields as follows:
4. Optional – Tap on Select Manufacturer to view a list of available manufacturers and add one to the equipment record.
5. Optional – After selecting a manufacturer, tap on Select Model to view a list of model numbers associated with the manufacturer and select one. **Note that manufacturers and model numbers must be setup in the system by an admin user prior to being able to select them on the mobile device.
6. Date in Service – This field will auto-fill with today’s date. Tap on the field and change the date if desired.
7. Task Reference Date – This field will auto-fill with today’s date. Tap on the field and change the date if desired. The task reference date is used as a starting date for scheduling all associated inspections.
8. Location Description – Tap on this field to place the curser and open the keyboard. Enter a detailed description of where the equipment is located.
Optional – You may scroll down further and enter new or use the links to select Building, Floor, and Area.
When finished click SAVE in the upper, right corner of the screen.

