The following steps will connect a Zebra Bluetooth scanner to the InspectNTrack app on an iOS device.

Step 2. Scan the discovery barcode:

Step 3. On your iOS device, open Settings –> Bluetooth. Ensure that bluetooth is turned on and the device is discoverable. The Zebra scanner will be displayed in the “Other Devices” section. Tap on the scanner name and answer the prompt to connect it.
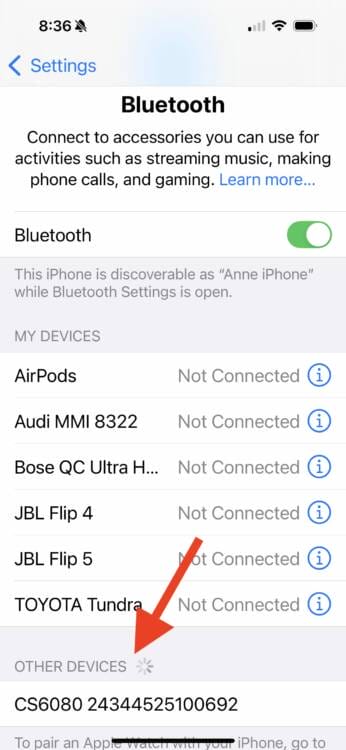
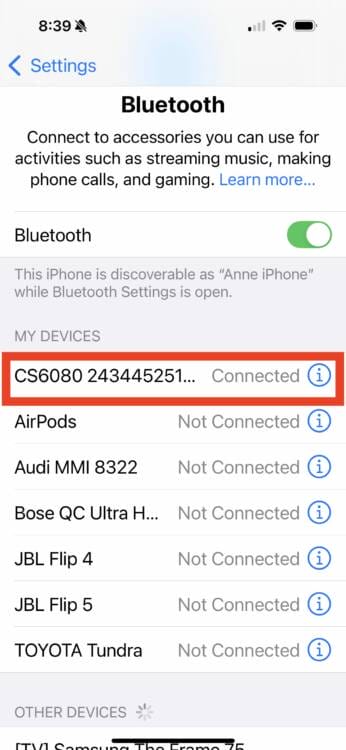
Step 4. Confirm that the scanner is success connected by verifying that is is listed in the “My Devices” section and shows a status of connected.
Next, you will make the connection between the scanner and the InspectNTrack app.
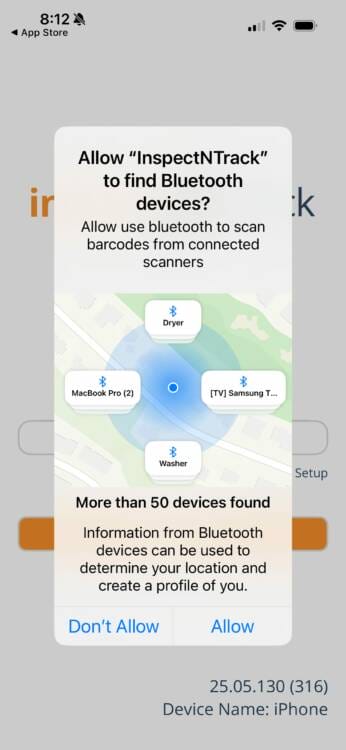
Step 5. If the InspectNTrack app is already installed, delete and reinstall it. If it is not installed, install it now. Open the InspectNTrack app. A pop-up message will display requesting access to find bluetooth devices. Answer “Allow”.
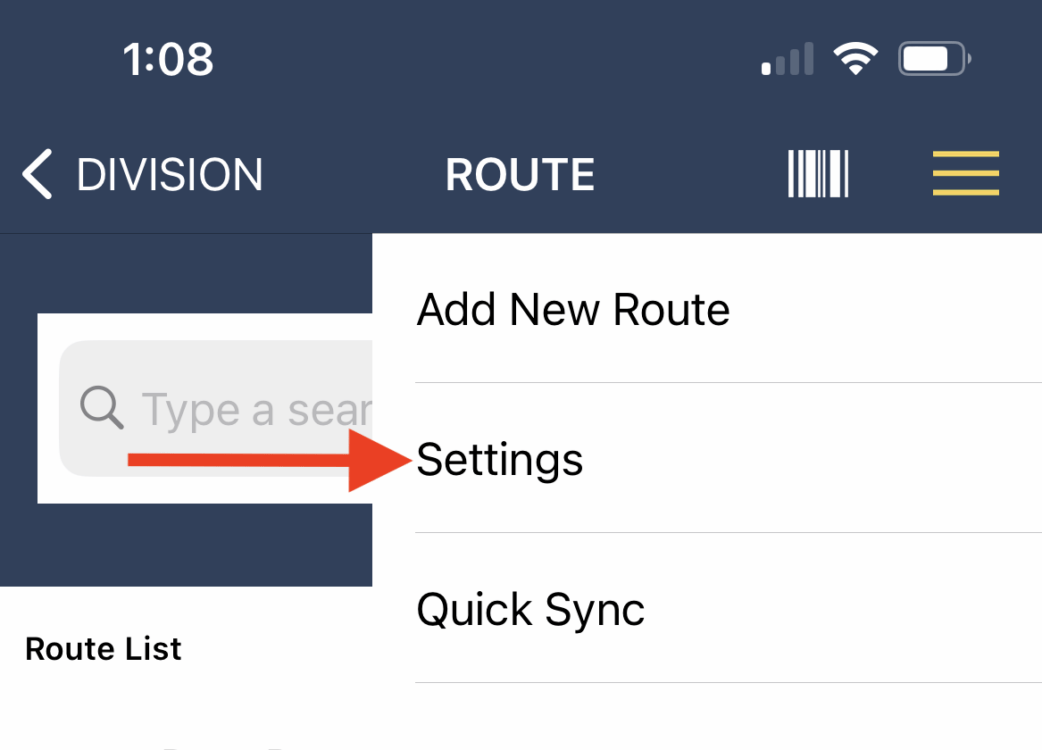
Step 6. Login to the InspectNTrack app. Open the app menu and select settings.
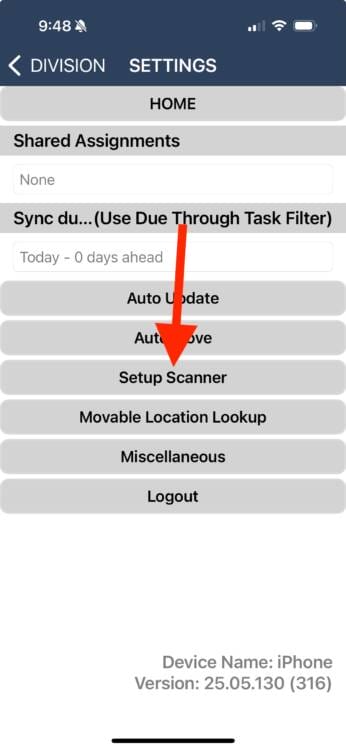
Step 7. On the Settings screen, select “Setup Scanner”.
Step 8. On the Setup Scanner screen, tap on “Socket Mobile” and change the selected device to Zebra.
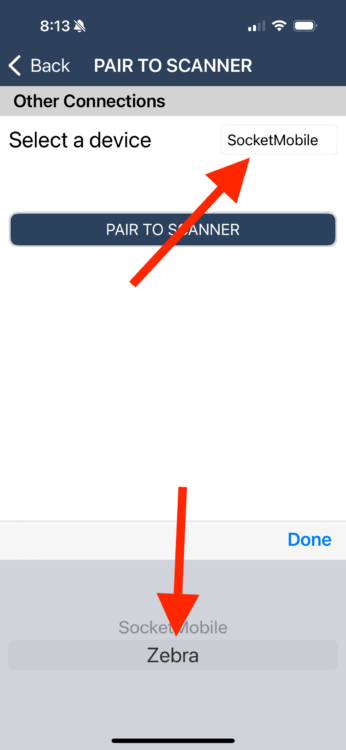
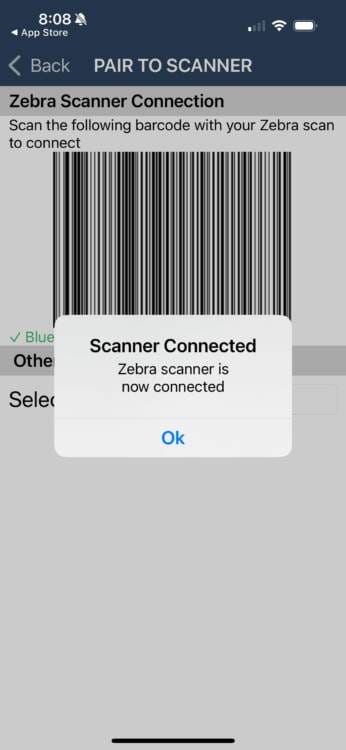
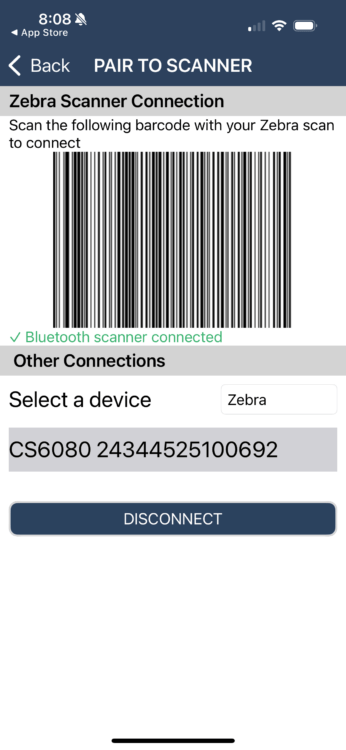
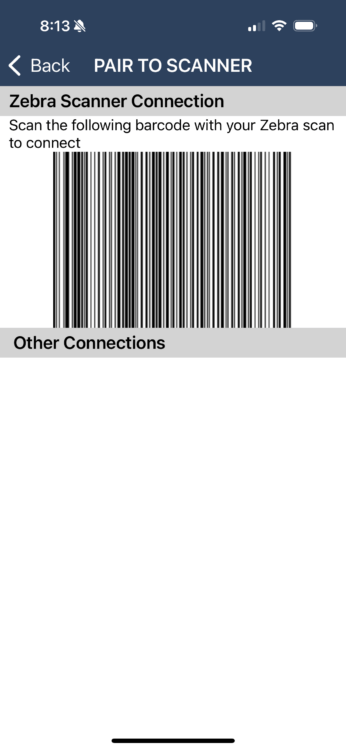
Step 9. A barcode will be displayed on the screen. Scan the barcode with the Zebra scanner.
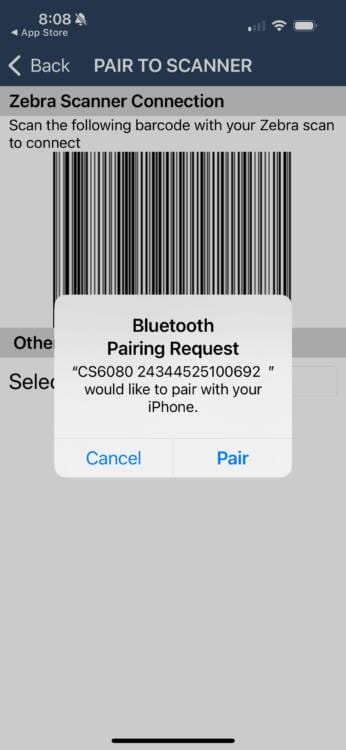
Step 10. A pairing pop-up request will be displayed. Select “Pair”
Step 11. After successful connection, a pop-up success message will appear and the scanner will show as connected on the Setup Scanner screen. The scanner can now be used with InspectNTrack.
